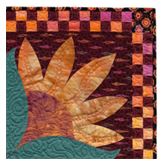
 We started the borders by adding blocks to complete the range of your borders on
 the sides of your material. We calculated the dimensions of slashing, as well as the size
 of your blocks. If you haven’t done so, use the example as followed to measure your blocks.
 Example:
 Three blocks appraising the 10-inch square, in addition to the four, terrazzo at one
 inch width, which adds to 34 inches?
How to create borders:
Once you finish your dimensions, insert ¼-inch seam and leave space to each side
of your textile. The side borders should measure up to 10 x 34, i.e. width and length.
The finishing measurement is factored into the ¼-inch seams you inserted.
You will need to take up the spaces or seams left (later) to complete your borders.
Once you insert ¼ inch you will have created 10 ½ x 34 1/2, which is the inches you will
use to cut to fit the borders along the side. Use the same dimensions to cut
at least two borders. The borders will cover each side of your fabric.
Now measure the lower and upper borders. Add your blocks together to achieve your size.
Follow the same method as outlined in the example above. Once you achieve your dimensions
finish the width on one side of your borders. You should have counted 10 x 43,
width and length unless you are quilting a larger or smaller quilt.
Next, insert another ¼ inch to your seams and leave space to each side.
Refer to your measurements 10 x 43. You will need to cut from the borders to achieve
10 ½ x 43 ½ inch to fit the edges at the top and bottom of your fabric.
You are creating a framed quilt so to speak. You may need to trim your borders to fit.
How to trim borders:
Starting at the crown of your quilt and working down to the middle, measure your quilt.
You wan the length dimensions. If your dimensions are 30 ½ inches, thus round it off to
the nearest tenth, i.e. 30 to complete your calculations: You will need to insert ¼ inch
into the seams and make room for your sides. Next, use measuring tape, or a ruler to measure
your quilt. Measure from the alongside and factor in the dimensions of your borders.
Now insert the ¼-inch seams to the sides.
Once you finish your borders, you will need to start stitching after your prep the strips
of your borders. Start by folding your strips. You will need to fold them in half and
search for the middle, then press until your borders crease. You can pin to mark. Now find
the middle of your sides by performing the same action as you did above. Mark again,
and then start stitching your quilt. The center should be aligned. The right sides should
come together, as well the crown should center. You will need craft pins to hold your
ends in tact.
Along the length, start stitching your borders. You will need to work the fabric as you
stitch to keep it in tact. If you are sewing on a machine, you can place the excess over
your machine parts, which accept the input of your fabric (Feeder dog) to align. Hold
back the shorter top layer and begin stitching slowly. The feeder will work the layers through.
You can pull the layers at the top through to slow the excess while allowing your feeder
to pull the layer at the lower end through. Now connect your borders, by stitching it to
your quilt. Insert the side of your fabric and allow your feeder to pull back
the layers at the top. Press out your borders and leave a seam to work through
the fabric border.
